Installing a Tractile Roof
Installing a Tractile roof can be faster than traditional roofs due to the lightweight, large format tile.
Simple and fast installation.
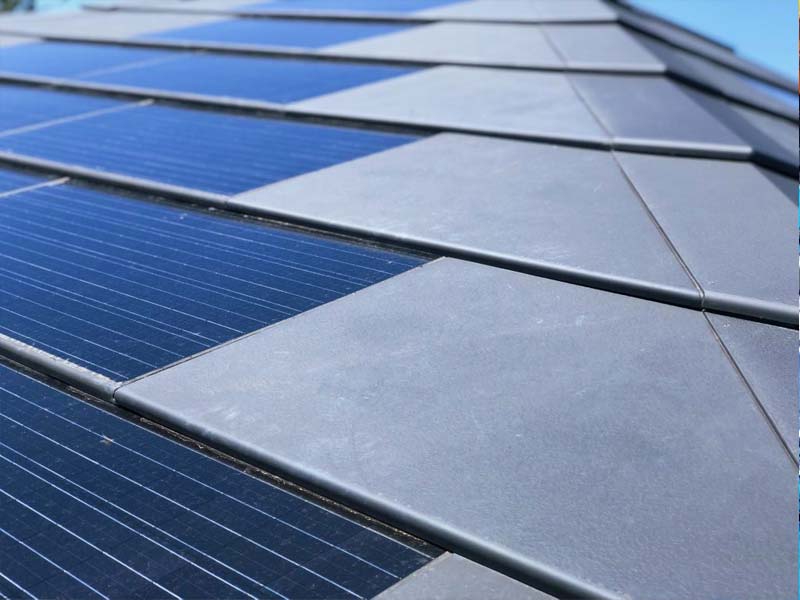
Both the regular Tractile tiles and solar tiles are installed using our hook & batten fixing system. Most roofs can be installed by a 2-3 person team of roof installers in less than 3 days.
Adjoining solar tiles connect to each other using standard solar electrical cables and MC4 connectors. The plumbing connections use SharkBite® connectors. These are positioned so that water cannot possibly leak into the roofing structure.
- Fixing System: Hook & Batten
- Head and tail lapping zone: 130mm
- Overlock and Underlock: 55mm

Installing Tractile vs conventional tiles
Tractile batten spacing is wider (565 to 585mm).
Tractile is a 4 times lighter than concrete tiles.
Tractile tiles are 6 times larger, so faster to install a roof area.
Tractile tiles and battens interlock, hence no screws or clips are required.
Each Tractile roofing component is designed to ‘slide-and-lock’ into place, ensuring a double action seal that eliminates wind, dust, embers, and water penetration.
Roof truss and batten spacing
Recommended roof truss spacing: 600 mm (maximum spacing 900 mm – subject to engineering approval, wind-zone, roof structure and location of solar tiles).
Recommended Tractile metal batten spacing: 565 mm (min: 560.5 mm; max 590 mm).
Battens are laid from the gutter and fascia and up to the ridge and then fixed with screws to the roof truss.
The gutter and fascia batten to be installed on the outside edge of the fascia.
Timber packer and metal flashing to be used at gutter tile.
Batten spacing is recommended at 565 mm from back edge to back edge to allow for building tolerances.
Top row of tiles are screw fixed and can be cut to fit. Cut tiles may require timber packer.
Ridge tiles are screw fixed to the ridge batten.

Cutting tiles to shape
Tractile non-solar roof tiles can be cut or drilled on site as required.
Tractile Solar tiles cannot be cut or drilled as this will impact the solar and hot water systems. Placement of solar tiles needs to be planned in advance to enable the required energy production along with running the solar cabling and plumbing as necessary.
Connecting solar tiles (PV)
Adjoining tiles connect to each other using standard solar electrical cables and MC4 connectors. The solar photovoltaic modules in the tiles are connected in series into a standard string inverter or combined in clusters and used with micro-inverters.

Connecting solar tiles (heated water)
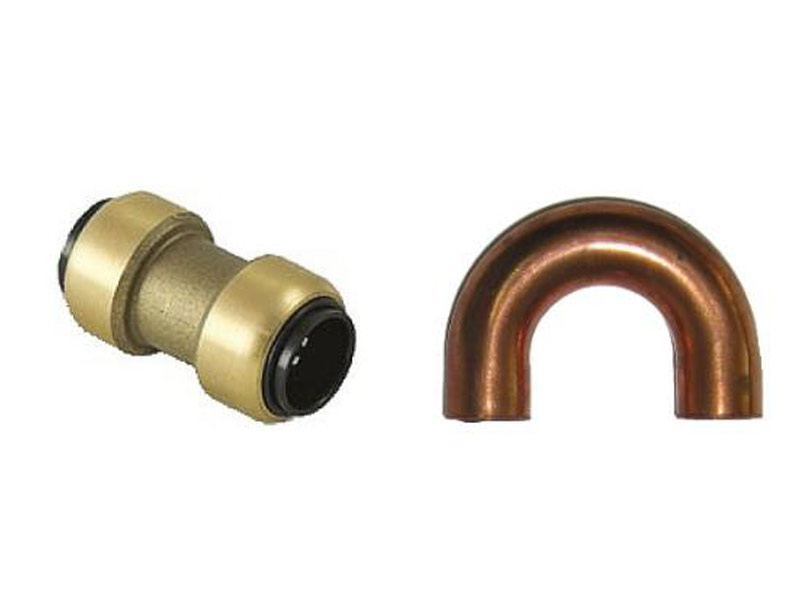
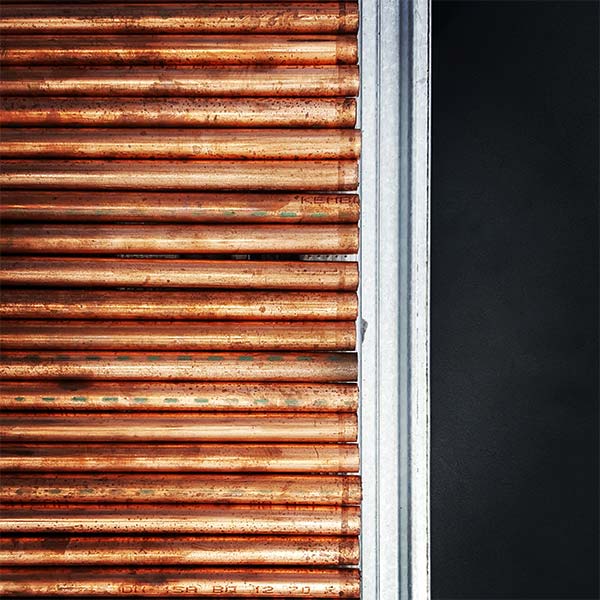
The plumbing connections between tiles use a SharkBite® push-fit connector and Tractile copper ‘U’ pipe, and tiles are connected horizontally in rows with ’T’ junctions at the end of each row connecting to either an inlet or outlet riser and equal flow manifold.
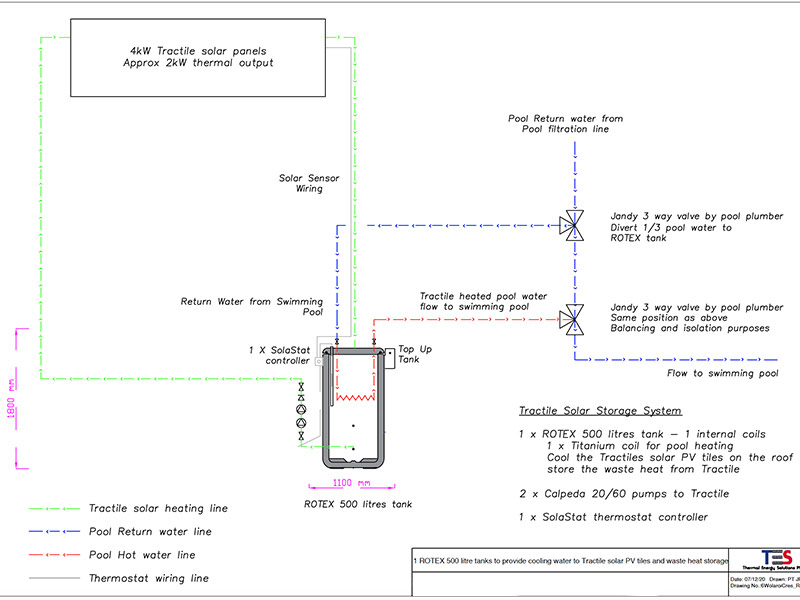
A pump circulates fluid through the tile array when the roof temperature is hotter than the tank temperature. A heat exchanger is used at ground level to transfer the heat to the required use.
Running water through the tiles is not essential, however it is recommended for warmer climates to cool the photovoltaic modules which increases the electricity produced.
Connecting Tractile to an inverter and battery system
Tractile solar tile arrays connect to all major inverter and battery systems including safeguards for cutting the power at certain points during installation and household maintenance.

Connecting Tractile a heat exchanger
Pressure in the system is regulated to a maximum of 100kPa.
The maximum number of tiles that can be connected in series in a row is 5 tiles.
The maximum rows in a manifold depends on roof pitch.
The pump controller starts when roof temperature is higher than the tank temperature.
Performance is impacted by tank size, the number of tiles connected along with weather conditions and household consumption patterns.
Get help & advice to install a Tractile roof
Our technical team are available to help you and your team with installer training so you'll have a hassle-free roof install with Tractile.
Frequently asked installation questions.
What precautions are taken to avoid leaks?
Tractile Solar Roof Tiles are designed to withstand up to 1000 kPa water pressure with an operating pressure less than 100kPa.
Our patented Sharkbite® fittings have a 25-year warranty. During installation each row of connections is pressure tested before installing the next row.
The plumbing connections are located on the upper surface of the tile, in the unlikely event of a leak occurring, any leak will drain to the external surface of the roof, both identifying the location of the leak and preventing an internal water leak to the house.
Where is the Tractile roof made?
The Tractile roof is made in our manufacturing facility in Malaysia. The Solar PV cells are sourced from high-quality cell manufacturers and laminated in PV modules to our custom design. The PV modules are assembled in the Eclipse solar tile chassis in Malaysia.
What are Tractile lead times for delivery?
Delivery time is confirmed when an order is placed. Typical lead time is between 4 to 12 weeks depending upon the order volume.
How is Tractile transported from factory to site?
Tractile is packed in boxes on pallets and shipped in containers to be delivered to site by truck. A single pallet will hold up to 37 square metres. A 20 foot shipping container will hold up to 300 square metres. A 40 foot shipping container will hold up to 700 square metres.
Can a damaged Tractile Solar Roof Tile be replaced?
It is extremely unlikely that a Tractile part will be damaged. If damage occurs the part can be replaced. Remove the end tile of a row and slide out neighbouring iles to access the damaged part, remove and replace it, then return all tiles back to position.